

How To Draw A Hand Holding A Knife
The Secret to Drawing a Hand
Are you 1 of those people that absolutely loathes cartoon easily? Do you hide the hands in pockets or backside the behind the person's back? There's no reason to approach cartoon hands like that. It'southward true that well-nigh people believe that hands are some of the hardest things to draw. NOT Then!
I'll be honest, drawing easily is difficult when you don't know what to look for. Just when y'all know how to look for specific shapes, they are a lot easier to draw. Drawing hands, or anything else for that matter is as easy as drawing some simple shapes. I'm talking square and triangle simple.
Shapes that Brand up the Hand
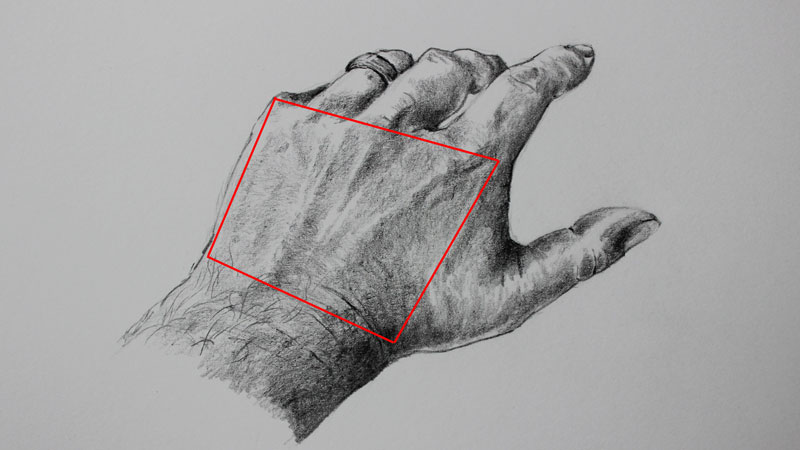
Look at your own hand. If you look at the bones shape of the palm, you'll notice that it makes the shape of a square. This square tin can change a bit when the mitt is in a dissimilar position, but it'due south nonetheless at that place. You lot tin almost think of the the square that makes upwardly the palm as sheet of paper. A sheet of newspaper is rectangular in shape simply it can be bent and tin can appear curved at sure angles.
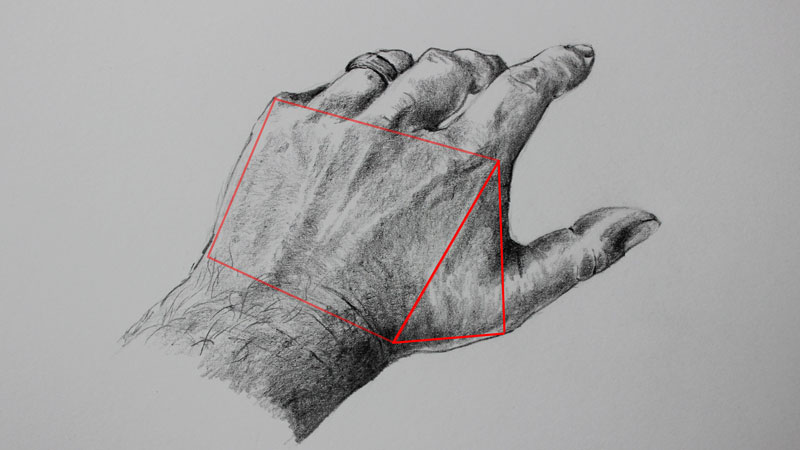
The shape that is created where the palm meets the thumb of the hand is a triangle. Here again, this triangle shape can change a bit when viewed from dissimilar angles, merely it'south nevertheless there. You just take to know to look for that shape.
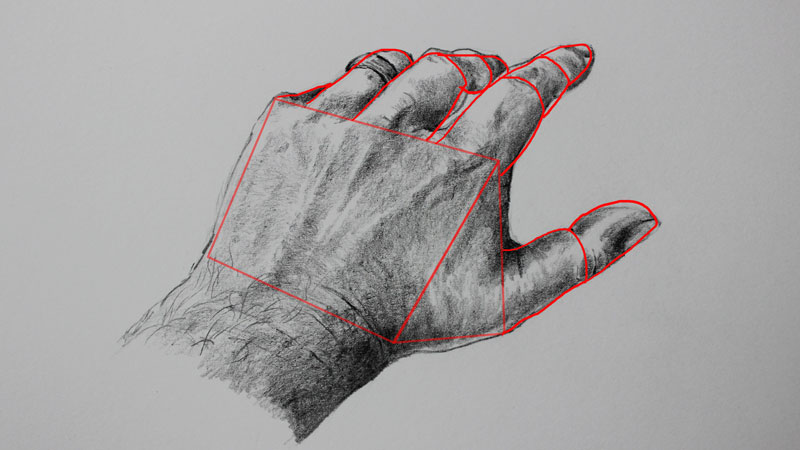
Then it'south on to the fingers. The shape of a finger is simply a cylinder. The main fingers are made upward of three pocket-sized cylinders, while the thumb will only accept ii. Depending on the angle, the cylinders of the fingers may overlap, roofing some of them from view. The cylinders may also taper or become larger depending if any foreshortening is involved.
Remember, by irresolute the angle of the hand, the shapes may change a piffling- merely they're nonetheless there. You need only to train your eye to observe the shapes that brand up the construction of the hand. Fortunately, these shapes are easy to describe.
After yous've drawn the shapes, describe the profile lines. Use the shapes as a guide. (Make sure your proportions are right.) Once the shapes are there on the surface, cartoon the outlines is a lot easier. This allows you to concentrate on the lines that you add to the drawing. Exist sure to describe the lines with consideration to line quality. Add variety to your line and push the illusion of form through the marks that you make.
Typically areas where the hand becomes larger will require thicker lines. Areas of shadow will also need thicker lines. Some areas may receive a very sparse line, or mayhap no line at all.
Create the Illusion of a Light Source
Nosotros see objects and make sense of the world around usa based on the lite. It is the low-cal that informs united states of the form of the objects that we run across. Every cartoon needs to take a defined light source. Nosotros can create the illusion of light through our use of value, or the darkness or lightness of a color.
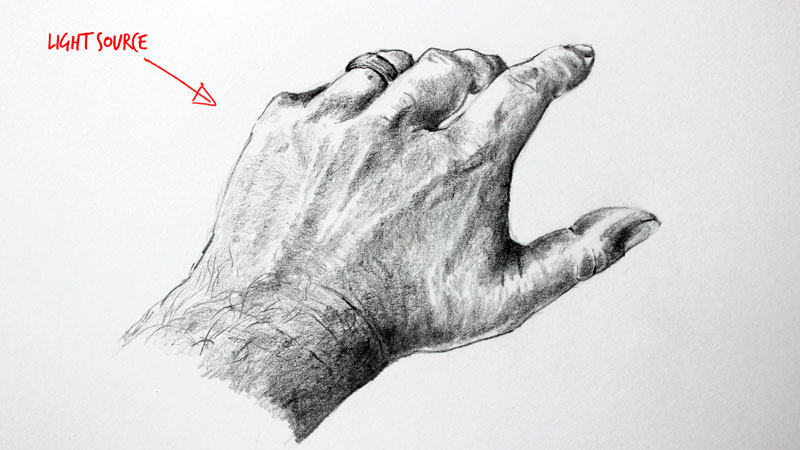
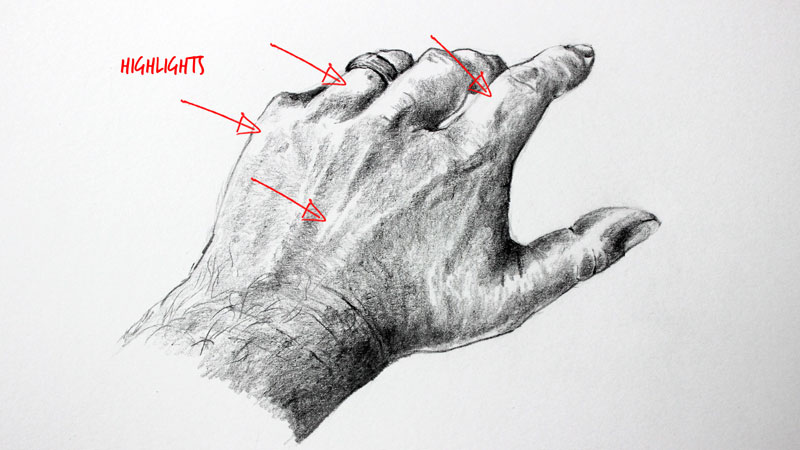
The lite source is defined by factors that are related to value. On the side of the hand that receives the calorie-free source, we will see highlights which are communicated by tints (light values). Areas that protrude volition likely be areas of highlight.
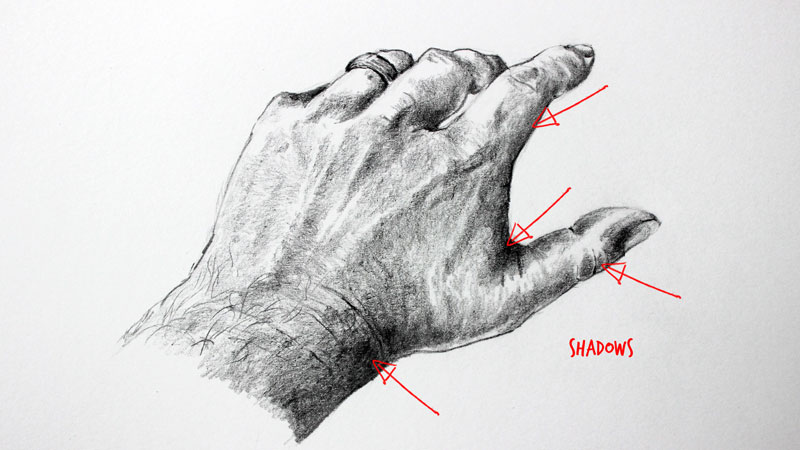
On the opposite side of the lite source, nosotros volition see shadows. These areas will be communicated through darker values. Areas that recede will likely exist areas of shadow.
Make sure to include a full range a value when you draw hands. Remember, it is the value that tells the viewer about the form of the hand.
Nothing drives me crazier than to meet a pupil draw a figure and hide the easily! There'due south no need for that! It's not hard to draw hands!

Drawing Hands with Basic Shapes
Drawing hands is great way to practice your cartoon skills in general. We've always got them with the states, so we tin look at them and use them every bit references at anytime.
Let's accept another look at the process that nosotros explored above. This fourth dimension, we'll highlight each of the shapes, making them a trivial easier to run across. Take information technology a step at a time and pay shut attention to each shape. Take notation of how each shape can be used to depict a paw in any position.
Begin by drawing a shape that represents the backside of the hand. Most likely, this shape volition be rectangular, but it may bend slightly as we see beneath. (Call up, keep your cartoon fairly loose in the commencement stages. We can e'er refine the shape as we go along.)
Next, draw a triangle on the side of this shape. This shape will act as the connection between the thumb and the backside of the manus. On the lower portion, nosotros'll somewhen add a thumb.
Next, a few smaller cylinders can exist drawn extending outward from the rectangular shape that was fatigued for the behind of the manus. These shapes volition become the lower portions of each of the fingers.
A second fix of cylinders are drawn to extend the fingers out further.
The fingers can be finished off with nevertheless another set of cylinders. Take notation of how each cylinder becomes a segment of the finger.

Outlines and shadows tin be added to finish the drawing of the hand. Recollect to consider the lite source when you are adding the shading. It should be consistent for all of the parts of the manus and each of the fingers.
More Lessons You'll Beloved...

Source: https://thevirtualinstructor.com/how-to-draw-hands.html
Posted by: mendenhallfleavermak.blogspot.com
0 Response to "How To Draw A Hand Holding A Knife"
Post a Comment